Friday, 4 March 2011

A pine model of the strycsitten

I showed the plan for the construction in one of my previous posts, but I was not sure if it would work. I decided to make a full-scale model in cheap pine wood to test the construction, before I would make it in expensive European oak. The only size adjustment I made was reducing the length of the strycsitten to half (70 cm) of that of the plan, creating an oversized chair (or more modern, a love-seat) . Furthermore, the panels on the sides and the triangles were left plain and undecorated. The next series of photos shows the construction of the pine model in steps. 


These five photos show the layout of one of the several parts of the side of the strycsitten. Note the grooves for the panels and the triangles


 The triangles first have to be put into the grooves of the horizontal rail, as they also form part of the tenon, before they can be added to the legs of the strycsitten.


After that, the mid stile and the two panels were added to the constructed 'H', then the plank of the armrest finished the side of the strycsitten. I discovered later that the mid stile had to be fixed first to the horizontal rail (using dowels), then the panel added and after that the legs, and finished with the arm rest. This is because the panels also form part of the tenons of the mid rail and the legs.


The other parts were added in the same manner. Note that the long middle rail has the tenon 90 degrees turned ( photo on the right).


The framework is finished (left). The seating planks have to be adjusted for the sides of the strycsitten by removing some pieces (centre). Finally the backrest was added (right).


The finished model of the strycsitten. No dowels have been used yet to fix the parts (except for the backrest), as I wanted to be able to de-construct the model if needed.

Wax tablets

 
A few weeks ago we have made some wax tablets and styli. We already had one wax tablet (the large one on the photos), but I discovered on internet that a 14th century wax tablet was found in York, United Kingdom. This was in fact a set of eight small wax tablets in a leather case, which included a love poem on one of the tablets. The wax tablets are very thin, 1.5 mm (x 3 x 5 cm), much thinner than I previously thought possible. Our old wax tablet was 1.2 cm thick! The new tablets are not that thin, only 4 mm, but have writing wax on both sides of the tablet. The tablets are made of cherry wood and finished with linseed oil. The beeswax was coloured with hearth-black, which can be commercially bought (or home made).

The styli are made of a brass rod and hammered flat at one end. The point was filed as well as some decorations. The styli were then sanded and polished. 


A good resource on (Roman and Medieval) wax tablets can be found at http://www.larsdatter.com/tablets.htm.

Wednesday, 2 March 2011

Medieval toolchest: The dowel plate

A dowel plate is a simple tool, consisting of a thick piece of iron with holes of different sizes. The edges of  the holes are sharp and will cut dowels of a specific diameter, when pieces of wood are hammered through it. It is difficult to find a medieval reference to this tool, however a possible presentation of a dowel plate is found on a woodcut (detail shown left) in Van der Dyngen Erfyndung by Polydor Vergil from 1537 (Augsburg, Steiner, fol. VC r - also found as figure 219 in Van Tyghem, 1966). In principle, dowels could (more laboriously) be produced by hand using a chisel.

Dowels were used ubiquitous for all kinds of medieval woodwork: wooden frames of houses and sheds were secured by large dowels, mortise and tenon joints of furniture pieces by smaller ones. Wood for dowels need to have a straight grain, otherwise they would break during hammering. Dowels need to be slightly larger than the hole, which was drilled by an auger or brace. 

 The dowel plate in our medieval toolbox was also made by Dennis Riley.


These two images are from the miniature 'Building the ark of Noah' in the Bedford Hours. On the left a man can be seen drilling a hole for a dowel with an auger, whereas on the right a man is seated on the roof , hammering a dowel in a previous drilled hole.


Sunday, 20 February 2011

The strycsitten construction plan

I had measured one replica strycsitten at Loevestien (see previous post), however I wanted to know the approximate proportions of the other (stryc)sittens as well. I roughly determined the proportions in the table below, and used 44 cm as the standard seating depth for the painted strycsittens.

The image below (hopefully) shows what I mean with the different proportions. The decorated 'triangles' below the seating and armrest are given as a proportion of the height of the feet beneath the seating and above, respectively.


Source Approx. size L x D x H Proportion upper panel and lower “triangle” Height proportion above : below seating Feetrest details Other details
Campin – St. Barbara 150 x 44 x 80 1/4, 1/4 2 : 3 Feet inside
Campin - Merode 180 x 44 x 80 1/4, 1/3 2 : 3 Feet inside Seating boards are inside frame, lions on arm
Meister Schoppingen 180 x 44 x 75 1/4, 1/2 2 : 3 Feet inside, plank with hook Lions on arm
V/d Weyden - Annunciation 1 : 1 none Fixed backrest
Rijksmuseum 78 x 50 x 75 - 2 : 3 none French type, closed panels
Loevestein 224 x 44 x 73 1/4, 1/3 1 : 1 Two attached to frame
Stollentruhe 116 x 42 x 85 - 2 : 3 none German type
Stollentruhe 146 x 37 x 77 - 2 : 3 none German type
Schlossmueum Berlin 194 x 55 x 86 - 2 : 3 none French type, closed panels


The strycsitten I wanted to make is intended to be used at the dining table in my living room. (Although suitable for re-enactment, its size is far too large to move it around in a simple car.) My dining table is 1.40 metres long, so the length of the strycsitten had to be approximately like that. Furthermore, the seating height had to be comfortable for modern length persons (e.g. me and my family), meaning a seating height of approximately 45 cm. My first intention was to use the Loevestein plan for the strycsitten, but later I changed it to the one depicted in the painting of the Meister of Schoppingen. In the end, my plan was an adaption of the latter and looked like this:


The strycsitten also includes a footrest. The black dots in the plan are dowel pins, securing the mortise and tenon joints. A scale bar in centimetres is provided in the plan. Actually I drew the plan shown above after the construction of the strycsitten. The sketch I used during construction (see below) was much more chaotic and had measurements all over.


Tuesday, 8 February 2011

Medieval toolchest: The two-handed saw


One of the items in my medieval toolchest is a large two-handed saw. In many medieval miniatures of building sites this typical saw can be seen, e.g. in 'Noah Building the Ark' (actually a house) in the Bedford Book of Hours (Paris, MS 18850, f 125 verso)(see detail of the miniature on the left) It loosely resembles a two-handed cutlass. It has a long straight handle and a round guard between the blade and the handle. The saw is long and has a length between 70-150 centimeters. The teeth of the saw are usually shown pointed forward, indicating that it is used on the push. Also the position of the men using the saw suggests a push action. The saw is typically used for cutting planks or beams to length.

My two-handed saw is 90 cm long and was made by Dennis Riley, a re-enactment blacksmith specialising in tools (daegrad.co.uk). The saw needed some extra sharpening and setting; the marks of the sawset (the light indents on alternating teeth) can be seen on the picture on the right.


Below you see the saw being used in the Historic Open Air Museum in Eindhoven, the Netherlands by another re-enanactor. He had great difficulty using the saw on the push as he had first fixed the boards to the attic beam with nails and could not use his full muscle power to wield the saw.


Some more strycsitten images

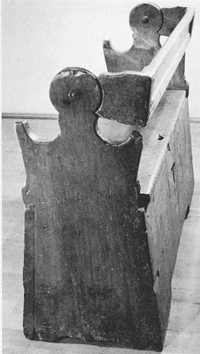
Once you start looking for strycsittens, you will notice them everywhere. I have found some more images in some of my books: one German style strycsitten.and three French types. Again most of the strycsittens are placed before the hearth.


This is a German type from a painting. The original is from the Bayerische Landesambt für Denkmalpflege, München, Germany.

This miniature is from  the Pierpont Morgan Library Ms 705. Le mortifiement de vaine plaissance by Rene I, duke of Anjou, third quarter 15th century. 

 This miniature is from the Le livre des trois vertus by Christine le Pisan, 15th century. Bernicke rare book and manuscript library, Yale university, Ms 427.


This miniature I  found in one of my medieval cookbooks. I have no idea of the origin of this miniature. 


German type strycsitten from first half of the 16th century. 
Pine wood, height 85 cm, depth 42 cm, length 116 cm. Tiroler Volkskunstmuseum, inv.nr.20265.


Monday, 7 February 2011

The replica strycsitten of castle Loevestein

The castle of Loevestein in Poederooyen, the Netherlands is famous for the escape of Hugo de Groot in a book chest during the 80 years war. The castle claims to posess the original escape chest (however they are not alone in that claim). Inside the castle some fine reproduction medieval furniture can be found, made by 'Vakwerk in Hout' (http://www.vakwerkinhout.nl/index.html). One of the pieces  is a large strycsitten which is displayed (and used) in the entrance room. This strycsitten looks similar to that on the painting of St. Barbara by Robert Campin.

Usually you can only visit the castle by guided tour, but they were willing to let me stay in the rooms and take measurements and photo's at leasure.


Of course the strycsitten is positioned in front of the hearth. Is is approximately 2.5 meters long and needs the support of the extra legs in the middle, as well as the diagonal beams. 


The three legs at each side of the strycsitten rest upon a wooden frame. On both sides of the strycsitten are foot rests attached to the same frame. The strycsitten is constructed using mortise and tenon joints, secured by wooden pins.


The turnable backrest has a metal (bronze) cover. Also the turning arm is of metal.


The underside of the strycsitten shows that the legs are only connected to each other on top by a central beam and by the wooden frame on the floor. The seating boards are loose, i.e. not fixed to the strycsitten.


This photo gives you an impression of the amount of persons seating on this strycsitten


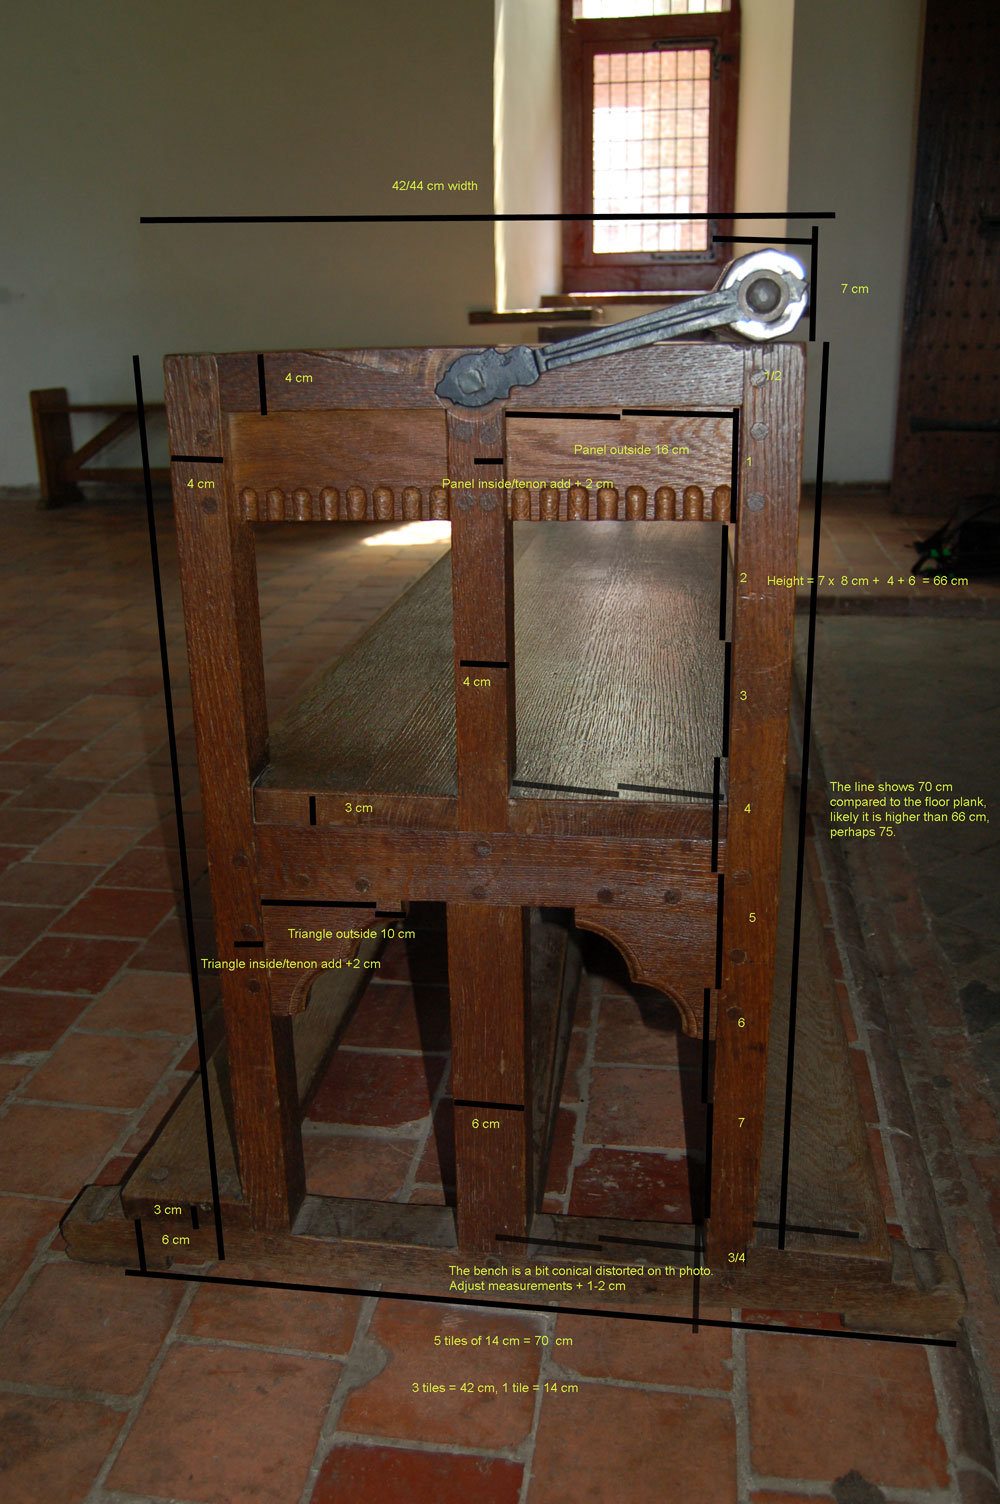
Drawing of the side measurements of the Loevestein strycsitten.


drawing of the front and bottom measurements of the strycsitten


 Scetch of the underside of the seating. The shaded part is cut out for the diagonal beam.


I thought I had measured everything of the strycsitten, unfortunately at home I discovered I had forgot some, e.g. the exact height. Using my photos, sizes of the floor tiles and my drawings I reverse engeneered the approximate missing measurements.