Thursday 14 July 2011

The 17th century toolchest of the Vasa

It is now holiday period in the Netherlands and I thought it might be interesting to show some holiday pictures of our visit to Sweden a few years ago. One of the main attractions was the Vasa Museet in Stockholm. In this impressive museum an original wooden warship from the 17th century is shown (which sank in 1628 on its maiden voyage) including all the related finds.

 This photo does not do justice to the overwhelming magnificence and size of the Vasa.
 
As the Baltic sea consists of brackish water, no woodworm is found. Hence, everything of wood was preserved while most iron items have rusted away. Among the items found in the Vasa are many woodworking tools used in shipbuilding. Also some shipbuilding techniques are on display at the museum. The next series of photos will give you an impression of the ship and its tools, of which many are identical to medieval (and modern) ones.

 A 'small' clamp used in boatbuilding. It is secured with a wedge at the end.

 
A mallet, brace and a moulding plane

 Two different smoothing planes and two rules.

A brace and a pot for something.

 The shipwrights toolchest. The wooden staves are handles for adzes
.
 Rule, universal bevel, a mallet, braces and awl handles (the oval things), a grease box.

 Some boxes and a twine spool.

 A square, saw handle, chisel handle, a brace and a smoothing plane.

 Braces and a wooden mallet,. At the end also an auger handle.

  Again, rule, universal bevel, awl handles and mallet.

The following photos are reconstructed tools, based on the finds.

  
 Auger and types of pins used in boat construction.

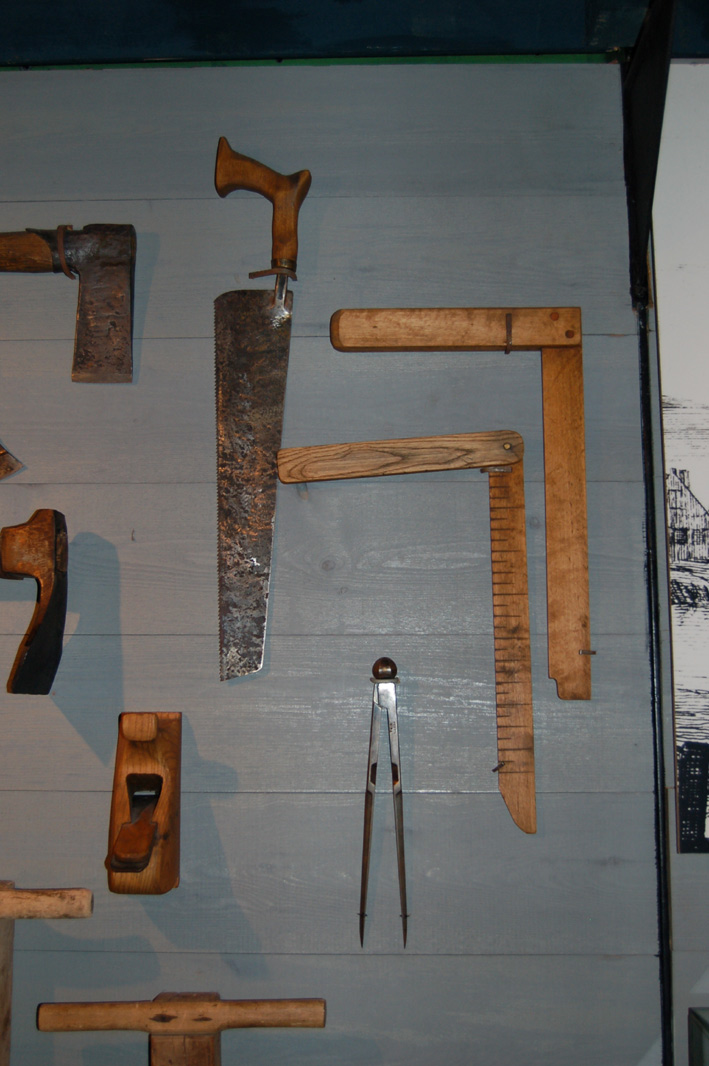
Saw, squares and compass.

 Several plane types, a chalk line, gouge and compass.

This type of place is typical Dutch and called a 'gerfschaaf'. 
Building of the Vasa was overseen by Dutch shipbuilders.

 Adzes and axes.

 Chisels and gouges, a mallet and a brace.
The following photos show some shipbuilding scenes.

 
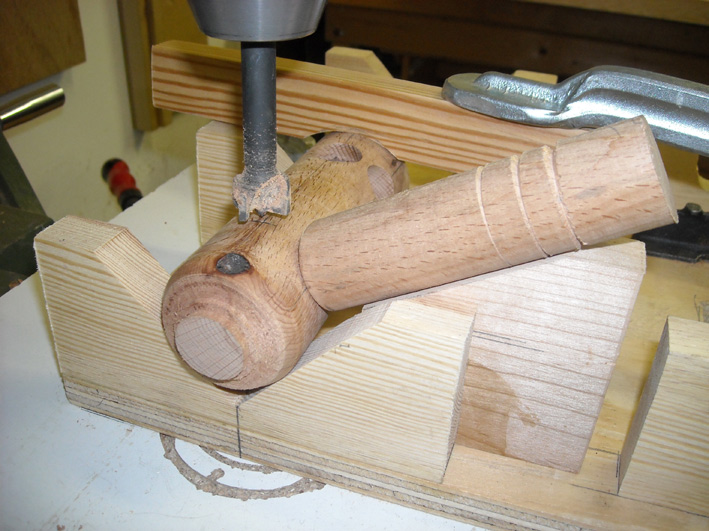
Set-up for hollowing out the masts. 

 
 The saw pit.

Set up for bending planks using steam or fire.

Wednesday 13 July 2011

Turned triangle stool

The turned triangle stools (or schemel or driestal in Dutch) were very popular in medieval and later times, becoming out of fashion in the 18th century. They can be found in many medieval paintings and manuscripts, e.g. the "scupstool" of Rogier van der Weyden (around 1450) in the New York Metropolitan Museum of Art. However no real medieval examples exist in musea. John Howe has written an article in Dragon 4 of the Company of St. George on medieval seating furniture, containing many different images of triangular stools. Basically these stools appeared in two types: with and without a backrest. The turned triangular stools without a backrest were found in all kinds of sizes, and serving as seating as well as side tables. The seating could be a woven reed mat, a wooden slat or a piece of leather.

 The Scupstool by Rogier van der Weyden (around 1450). Pen drawing on paper.

Robert Campin - Madonna. The triangle stool is used here as a side table.

The construction of these stools is simple: 3 turned round legs are connected to each other with two horizontal turned rails, with in turn are connected with one, two or three smaller vertical turned rails. Turning is rather straightforward; the problem occurs in drilling the holes and connecting the parts to each other. A very good guide to construct them is provided by Tom Retie on his webpage 'Blood and sawdust': - Tryangle stolys for my Lord. 

 All the turned parts together. The ends still have to be sawn off the tenons.

The triangle turned stool I made and finally finished this month is a small, children size one. I chose this size so it can serve as seating for my children, as well as being a small and handy example of such a stool (leg height 36 cm). The triangle stool was turned of seasoned beech (i.e. some parts used to be old square table legs), the seating is a single wooden beech slat (thickness 12 mm). The diameters of the legs, horizontal and vertical rails were 5, 3 and 2.3 cm respectively. I worked on this project once in a while during several years when I had no other project at hand; so it happened that some parts I has turned a year ago had warped to much to be usable, and I had to make these parts again ...


This jig is used to draw a horizontal line across the legs. A similar one was used for the horizontal rails. 
A horizontal line is needed in order to drill the mortises at identical positions.

This jig is used to drill holes in the horizontal rails. The tenons fit precisely in the "U". 
The rail is then secured with two clamps.


As mentioned before, drilling the holes is tricky, especially the holes in the legs have to fit exactly at 60 degrees. I made a jig to fix the legs at the correct position. I used a machine drill with Forstner bits to drill the holes for the rails. Next I used a routing table to cut the groove for the seating slat.

The previous jig now has a part added for drilling holes in the legs

One horizontal rail rests at a 30 degrees angle on the jig, leaving 60 degrees between 
the holes of the horizontal rails. This photo shows a test piece, the next one the actual chair.

The horizontal rails fit at exactly 60 degrees (test piece).

All turned pieces fitted together.


 The stool from above without the seating.

Then the triangular seating slat needed to be chamfered at the underside to fit in the groove. This was done in medieval style by hand with a round moulding plane at the Historic Open Air Museum Eindhoven.

Holdfasts keep the seating in place. The other piece of wood is used as a guide for the moulding plane. 
Note that the seating edges are hollowed out to allow room for the legs.


The next step was to [paint the decorative grooves on each rail using egg tempera with red pigments (These grooves are also used to centre the place for drilling). Then the pieces were put together and fixed with a 4 mm dowel for each mortise - tenon joint pair. Afterwards the stool was finished with two layers of linseed oil. 
 

The decorative grooves on the (horizontal) rails are used as a centre for the other (vertical) rails.

The groove for the seating is asymmetric. It starts halfway the horizontal rail and goes 5 mm upwards. 
This provides maximum support for the seating as well as a minimum edge difference.

The painted triangular stool, with the seating fitted and locked with six dowels in total. 
Only the linseed oil coating remains to be done.