This post continues the series on making a six-sided tresoor for castle Hernen. Previous posts concerned the large and small panels and the frame, this post will concentrate on the construction of the drawer. We had visited the Muiderslot some years ago to have a more detailed look on how a medieval drawer was constructed (see the post 'A Medieval drawer' of 1 March 2019). The drawer of the tresoor was made based on this construction.
Making the drawer
The design of the drawn on the drawer front.
The front panel was first carved like the middle small panels (see
previous post). Then two grooves were made on the backside using a router table - first with a straight router bit, followed by a dovetail router bit, so that two dovetail grooves appeared at the short sides of the (back of the) front panel. These were to connect the side boards of the drawer. Then a long groove was made at the bottom of the backside with a straight router bit; this groove was to fit in the bottom boards of the drawer.
Left: the front singele sided dovetail of Muiderslot drawer; Right: the front double sided dovetail of the Hernen drawer.
Note that the Muiderslot drawer has more wood sticking out than the Hernen drawer.
The back and the side boards were connected with one large dovetail, like the Muiderslot drawer. These were sawn and cut by hand. Also the long dovetail of the front was sawn and cut by hand with a chisel.
Left: The large dovetail at the back of the Muiderslot drawer; Middle and Right: the large dovetail of the Hernen drawer.
Left: The large dovetail at the back of the Muiderslot drawer; Middle and Right: the large dovetail of the Hernen drawer.
For the bottom planks a few oaken panels of old furniture were reused. First they were made of the same thinness (around 5 mm), and fitted together with a V-groove. At the sides the bottom boards protruded a few cm. The parts that stuck out later will fit in the sliding rail of the drawer. The bottom rail was fixed with square pins to the sides of the drawer.
Left: using a recycled thin oak board from a demolished piece of furniture as bottom for the drawer. Note the groove where the bottom board fit into the drawer front. Right: the V-groove connecting the bottom boards together.
Showing the bottom of the drawer from the inside and outside. Note that the bottom boards are wider that the drawer.
The extruding part is used in the sliding rail.
Fixing the bottom of the drawer with square wooden pins.
View of the bottom with the pins after cleaning up.
Also the dovetails at the back were fixed with wooden pins, just like the Muiderslot drawer (left).
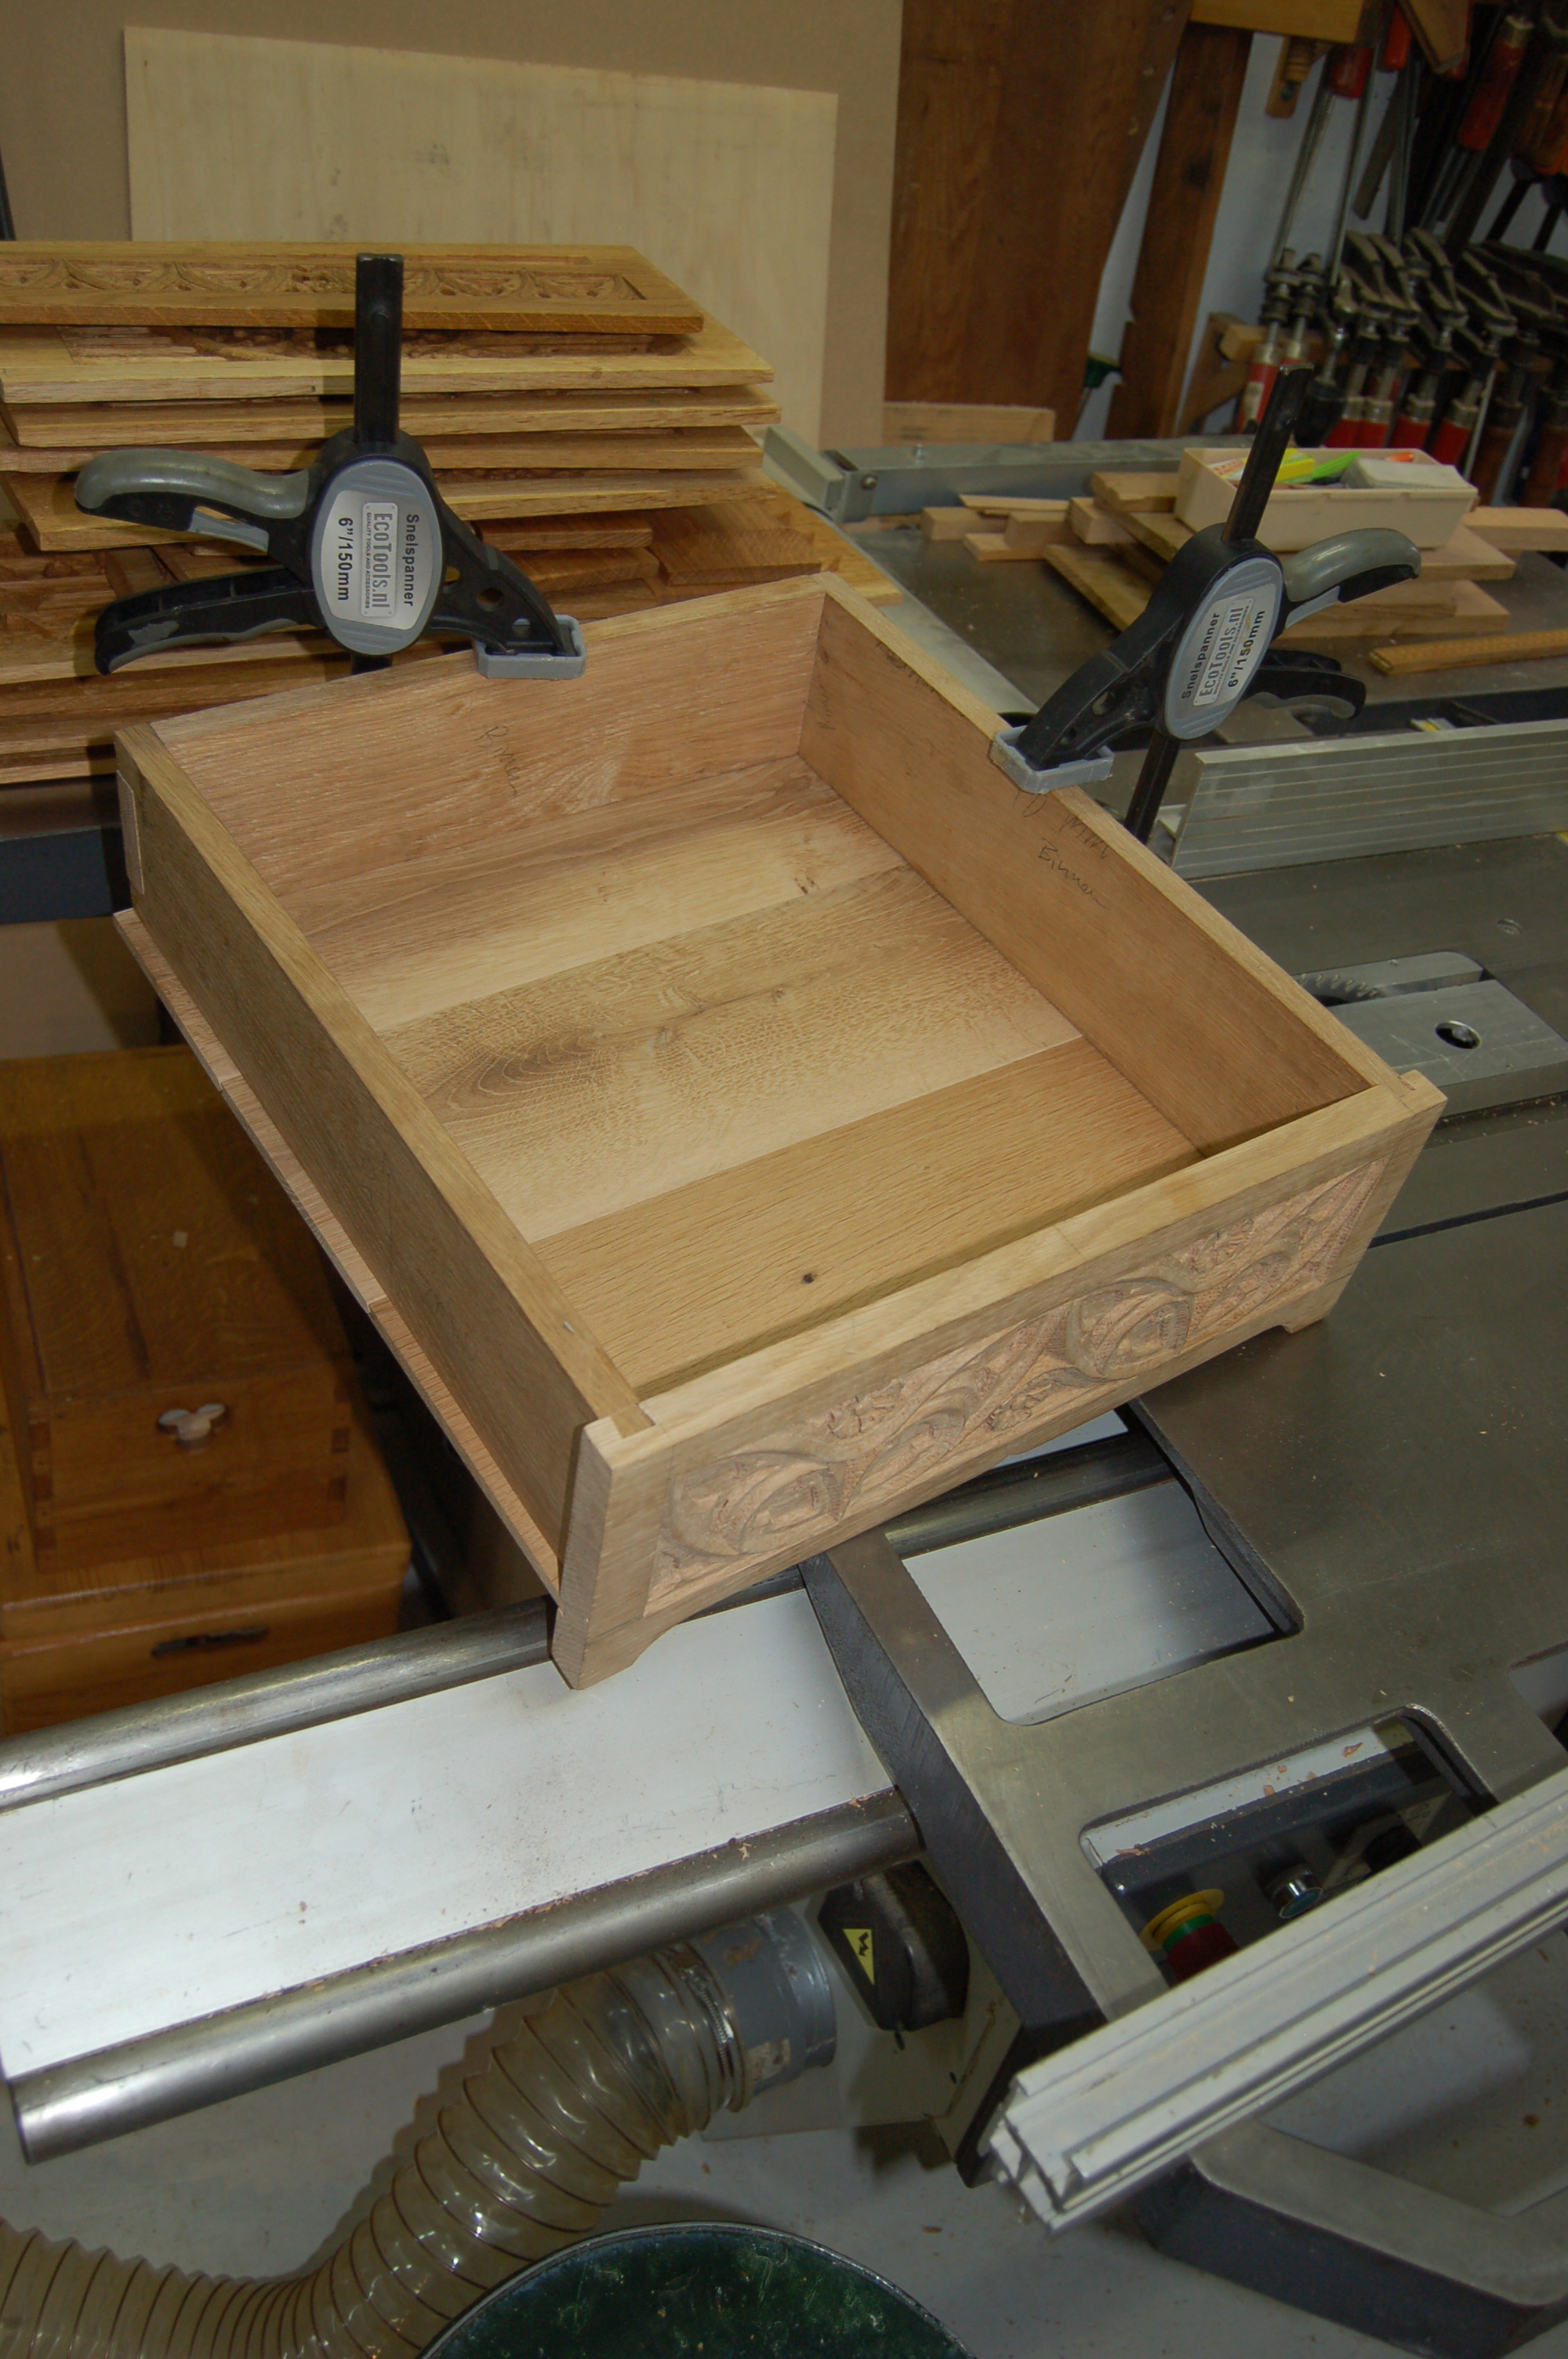
The inside and the outside of the finished drawer seen from the back.
The inside and the outside of the finished drawer seen from the front.
Making the drawer rail
The drawer rail of the Muiderslot drawer.
The basic drawer rail is a square oaken rod, with a groove in it. The groove was made using the router table and a straight router bit. The next step was more difficult: First positioning the rails attached to the drawer on the backframe of the tresoor, so that the exact position of the rails on the backframe could be marked. Then a square pin was made at one the end of each rail, and two corresponding mortise in the backframe of the tresoor (one for each rail).
The drawer hanging on two drawer rails seen on both sides. These drawer rails were attached to the back of the tresoor (you can see the linenfold panels).
Now the other side of the rails had to fit in the five-sided vertical front beam. This required that a part of the five sided beam had to be removed to fit a square rail. Also this side of the rails had a mortise and pin construction, so that the complete rail was fixed between the backframe and the front beams.
A bit of wax was added in the groove of the drawer rails to improve the sliding.

The finished drawer closed in the tresoor.
The finished drawer open in the tresoor.


Great execution and description of the process. I would like to know what finish you used to complete the piece with
ReplyDeleteI used boiled linseed oil as a finish
Delete