All the time I thought I was posting medium to high resolution photos on my blog, but it appeared I have been wrong.
Yes, when writing a blogpost I added the high-resolution photo, but then I edited the html/xml code behind it, cleaning up the code and removing the unnecessary things. Some appeared to be not so unnecessary as I thought: the <a href="............."> </a> code surrounding the image <img> code was the clickable link to the large picture.
My sincere apologies to you who deserve the large images.
However, the good thing is that the information to get the large images is still present in the blog. You only need to do something to get them. Below I explain how this works and give an example of how to do it. There were two clickable photos on the previous blog. This is one of them.
When you look at the source-code of the blogpost. For your Firefox browser this is right -click with your mouse and choose (view) source code. You will then see something like this.
<div class="separator" style="clear: both; text-align: center;">
<a href="https://blogger.googleusercontent.com/img/b/R29vZ2xl/AVvXsEgsOg7NheCl8epLWnjWQP33kSXjfdtp69QP54HvLSZpIhCnPD7uSc9ewVwlCX8n1g2Fbl9B6l0gHqrrbXck7ox5uRu-s6EDbGxTP1wudoet3RNg_P3mFcAR8vtAc0-M82GZjH4J4iqHoj-0wkeK99zvJh2GIFzUYv3op9V5dVahsfwOxL983AFEMr2y/s2953/lade-front.jpg" style="margin-left: 1em; margin-right: 1em;">
<img border="0" data-original-height="1661" data-original-width="2953" height="360" src="https://blogger.googleusercontent.com/img/b/R29vZ2xl/AVvXsEgsOg7NheCl8epLWnjWQP33kSXjfdtp69QP54HvLSZpIhCnPD7uSc9ewVwlCX8n1g2Fbl9B6l0gHqrrbXck7ox5uRu-s6EDbGxTP1wudoet3RNg_P3mFcAR8vtAc0-M82GZjH4J4iqHoj-0wkeK99zvJh2GIFzUYv3op9V5dVahsfwOxL983AFEMr2y/w640-h360/lade-front.jpg" width="640" /> </a></div>
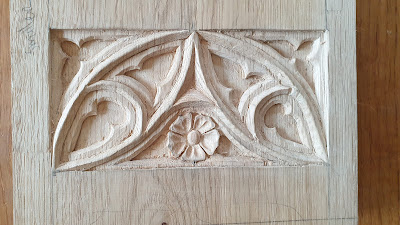
<div class="separator" style="clear: both; text-align: center;"><span style="font-size: x-small;"><i>The design for the front panel of the drawer.</i></span><br /></div>
If you compare both the image source of the small image (the src=https) with that of the large one (the a href=https), they are almost identical. The small one contains an indication of its current (small) size, e.g. the blue w640-h360 (see the orange height of 360 and width of 640 in the code), while the large one carries the original width (the blue s2953 . So all we have to do is swap the part of the small size with that of the original size. And luckily for us the original width is also given in the <img as data-original-width="2953" . So the replacement part should be s2953 . Do not forget to add the s before the original width.
EXAMPLE
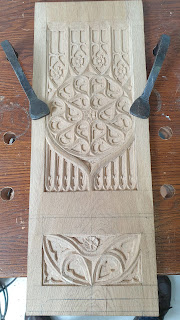
Thus for the unclickable image of the previous post shown below


- Display the source code of the blogpost in your browser.
- Find the <img ...... > line for the image and copy it to a text editor.
<img border="0" data-original-height="3150" data-original-width="1772" src="https://blogger.googleusercontent.com/img/b/R29vZ2xl/AVvXsEi8kdlwoNtRQvHwvIBSPXJFdxfXAOfULRJxVuM9J8y4lpI97QTos58SCbCAPQAMpOTf96g7NQaeOECq8VeqTFWboBT1BeQ1ZhObSoQzDmmYidzDLuf8FYdHgk9M4FnLOFSYDzhkp3Ey0clEBO9xTRUJIZxNJuWYno5pSk311LRwcS5R47FtqjKP3xoZ/s320/one-middle-panel-cutting.jpg" width="200" />
- Replace the part that here is marked in red with with s + the part marked in green, so s3150 for the first, and s1772 for the second. The part to replace is always between the last two forward slashes before the .jpg (name).
- You now made two valid internet links to the large images which you can copy directly into your browser. You then have access to these two large photos:


No comments:
Post a Comment