Thursday, 16 February 2023

The Tresoor of Castle Hernen (Part 6): The Front Panel Door

The door of the tresoor of chateau Langeais. A similar layout, but with different scenes was used for the front panel of the tresoor of castle Hernen.

The door consists of a 3-D carving, something which I had not done before and therefore was quite a challenge. We planned to make the topic of the door especially suited for Castle Hernen and the intended time period. The owner of the castle, Het Geldersch Landschap en Kastelen, likes to express the early renaissance period when Reyner van Wijhe was the owner (around 1514). This is still a suitable period for us to make late medieval furniture, as the tresoor was still in fashion at that time. 

 
Some carved doors of medieval dressoirs from the collection of the Rijksmuseum, Amsterdam, the Netherlands.

Left: The replica sandstone plate above the entrance of Castle Hernen. Right: The original sandstone plate with the heraldic arms of Reyner van Wijhe and his wife in the hall of Castle Hernen. 

   
Detail of the heraldic arms: Left - the red half a lion rampant on a silver shield of Reyner van Wijhe, Right -  the black bat on a silver shield of Margreta Van Eegeren.

Reyner van Wijhe and his wife did place a sandstone carving with their heraldic shields  above the entranceway of the castle. Today, the original worn sandstone (coloured) placate can be seen in the old hall of the castle, while a reconstructed one currently presides above the entrance. There was space for both the coat of arms of Reyner (half a lion rampant) and his wife (a bat) above and below the lock plate. We thought it would be more gender friendly if the coat of arms of the wife was place above that of the husband.

Foto
The killing of the dragon of Geldern by Wichard and Lupold. Painting in the townhall of Geldern, Germany.

The main part contains a scene from the legend of origin of the duchy of Guelders. This legend tells of a fire-breathing dragon that lived near the German city Geldern. The dragon was found under a medlar tree,  by two local noblemen Wichard and Lupold of Pont (though some sources mention only one) and slain by them around the year 878. With his last breath the dragon cried 'Gelre!!!!' which then became the name of the city and duchy. Later dukes of Gelre - Like Karel van Gelre - added this legend to their lineage to prove their right to rule the duchy.

Left: A fire-breathing dragon on a panel from Château Chambord, France. The F with the crown on the panel stands for King Francois I. Right: a traditional dragon slaying panel with Saint George or Michael putting a lance through the dragons mouth. The dragon is small compared to the armoured saint.
 
 
The battle of Caen (1346) from the Froissart's Chronicle of Louis Gruuthuuse, MS Fr. 2643, Folio 97 verso, Bibliothèque Nationale de France, Paris, France. Dated around 1470.
 
This soldier from the Froissart Chronicles served as example for the dragon killing 'Wichard of Pont'. The poor soldier was transformed, distorted and stretched as well as horizontally rotated using Photoshop.

The scene thereby consist of a fire-breathing dragon, with one of the brothers that is killing it. Below are the three red roses of Guelders. These are also connected to the legend, as they were originally white medlar flowers (of the tree), that were coloured red by the dragon blood. On top of the scene is the crown of the duke, showing he is the ruler of the duchy.

Two ducal crowns of Guelders: one from the armorial of Guelders (1396) by Claes Heinenzoon (left), Heraldic shield of Adolf van Egmont (1438 - 1477), with the chain of the order of the Golden Fleece.

We first thought this was a nice way to connect the castle, the owner Reyner, the GLK and the current province of Guelders together. Then it happened that Reyner was appointed as mayor of Nimweghen and owner of the castle by the rival duchy of Burgundy! A few years later the people of Nimweghen revolted and threw the Burgundians out. Now the scene could also be seen with different eyes. The Thomasguild is, of course, a pro-Guelders guild and insinuated by the scene that the mayor was actually a supporter of the duke of Guelders, instead of the duke of Burgundy.
 
Pre-design of the tresoor door with alternative hinges. 
The main part is intentionally left vague, as we did not have an idea at that time (2019).
 

Making the door of the tresoor

The door of the tresoor measures 40 by 40 cm with a thickness of 3.5 cm, and this was too large to be found as one piece of wood. Hence the front panel was glued together from two oak boards using hide glue. It has two double dovetails inserted at the backside to firmly fix both parts together. The front side is later fixed by the iron hinges.

Left: The two door boards ready for glueing. Right: the backside with the two double-sided dovetails.

The boards of the door glued together and clamped.

Left: The doublesided dovetails were around 8 mm thick and fitted very tightly. Right: the dovetail is glued and pressed into its slot with a clamp.  Afterwards the dovetail was planed flat with the door.

Carving Wichard and the dragon

Left: The first drawing of Wichard and the dragon on the oak door. Middle: the design for Wichard and the dragon. Right: The final drawing on the oak door.

The design was drawn onto the oak. Then, starting from the sides carving was started by hand, slowly deepening the relief and adding more detail. Mostly small sized chisels  (3, 4 and 6 mm), a variety of small fishtail and normal gouges, and carving knives were used. In the photos below the progress of carving is shown.


Some details of the carving. Left: The dragon beak with teeth. Right: The fingers holding the gleve.
 
Carving the border details.
 

Carving the heraldic lion and bat

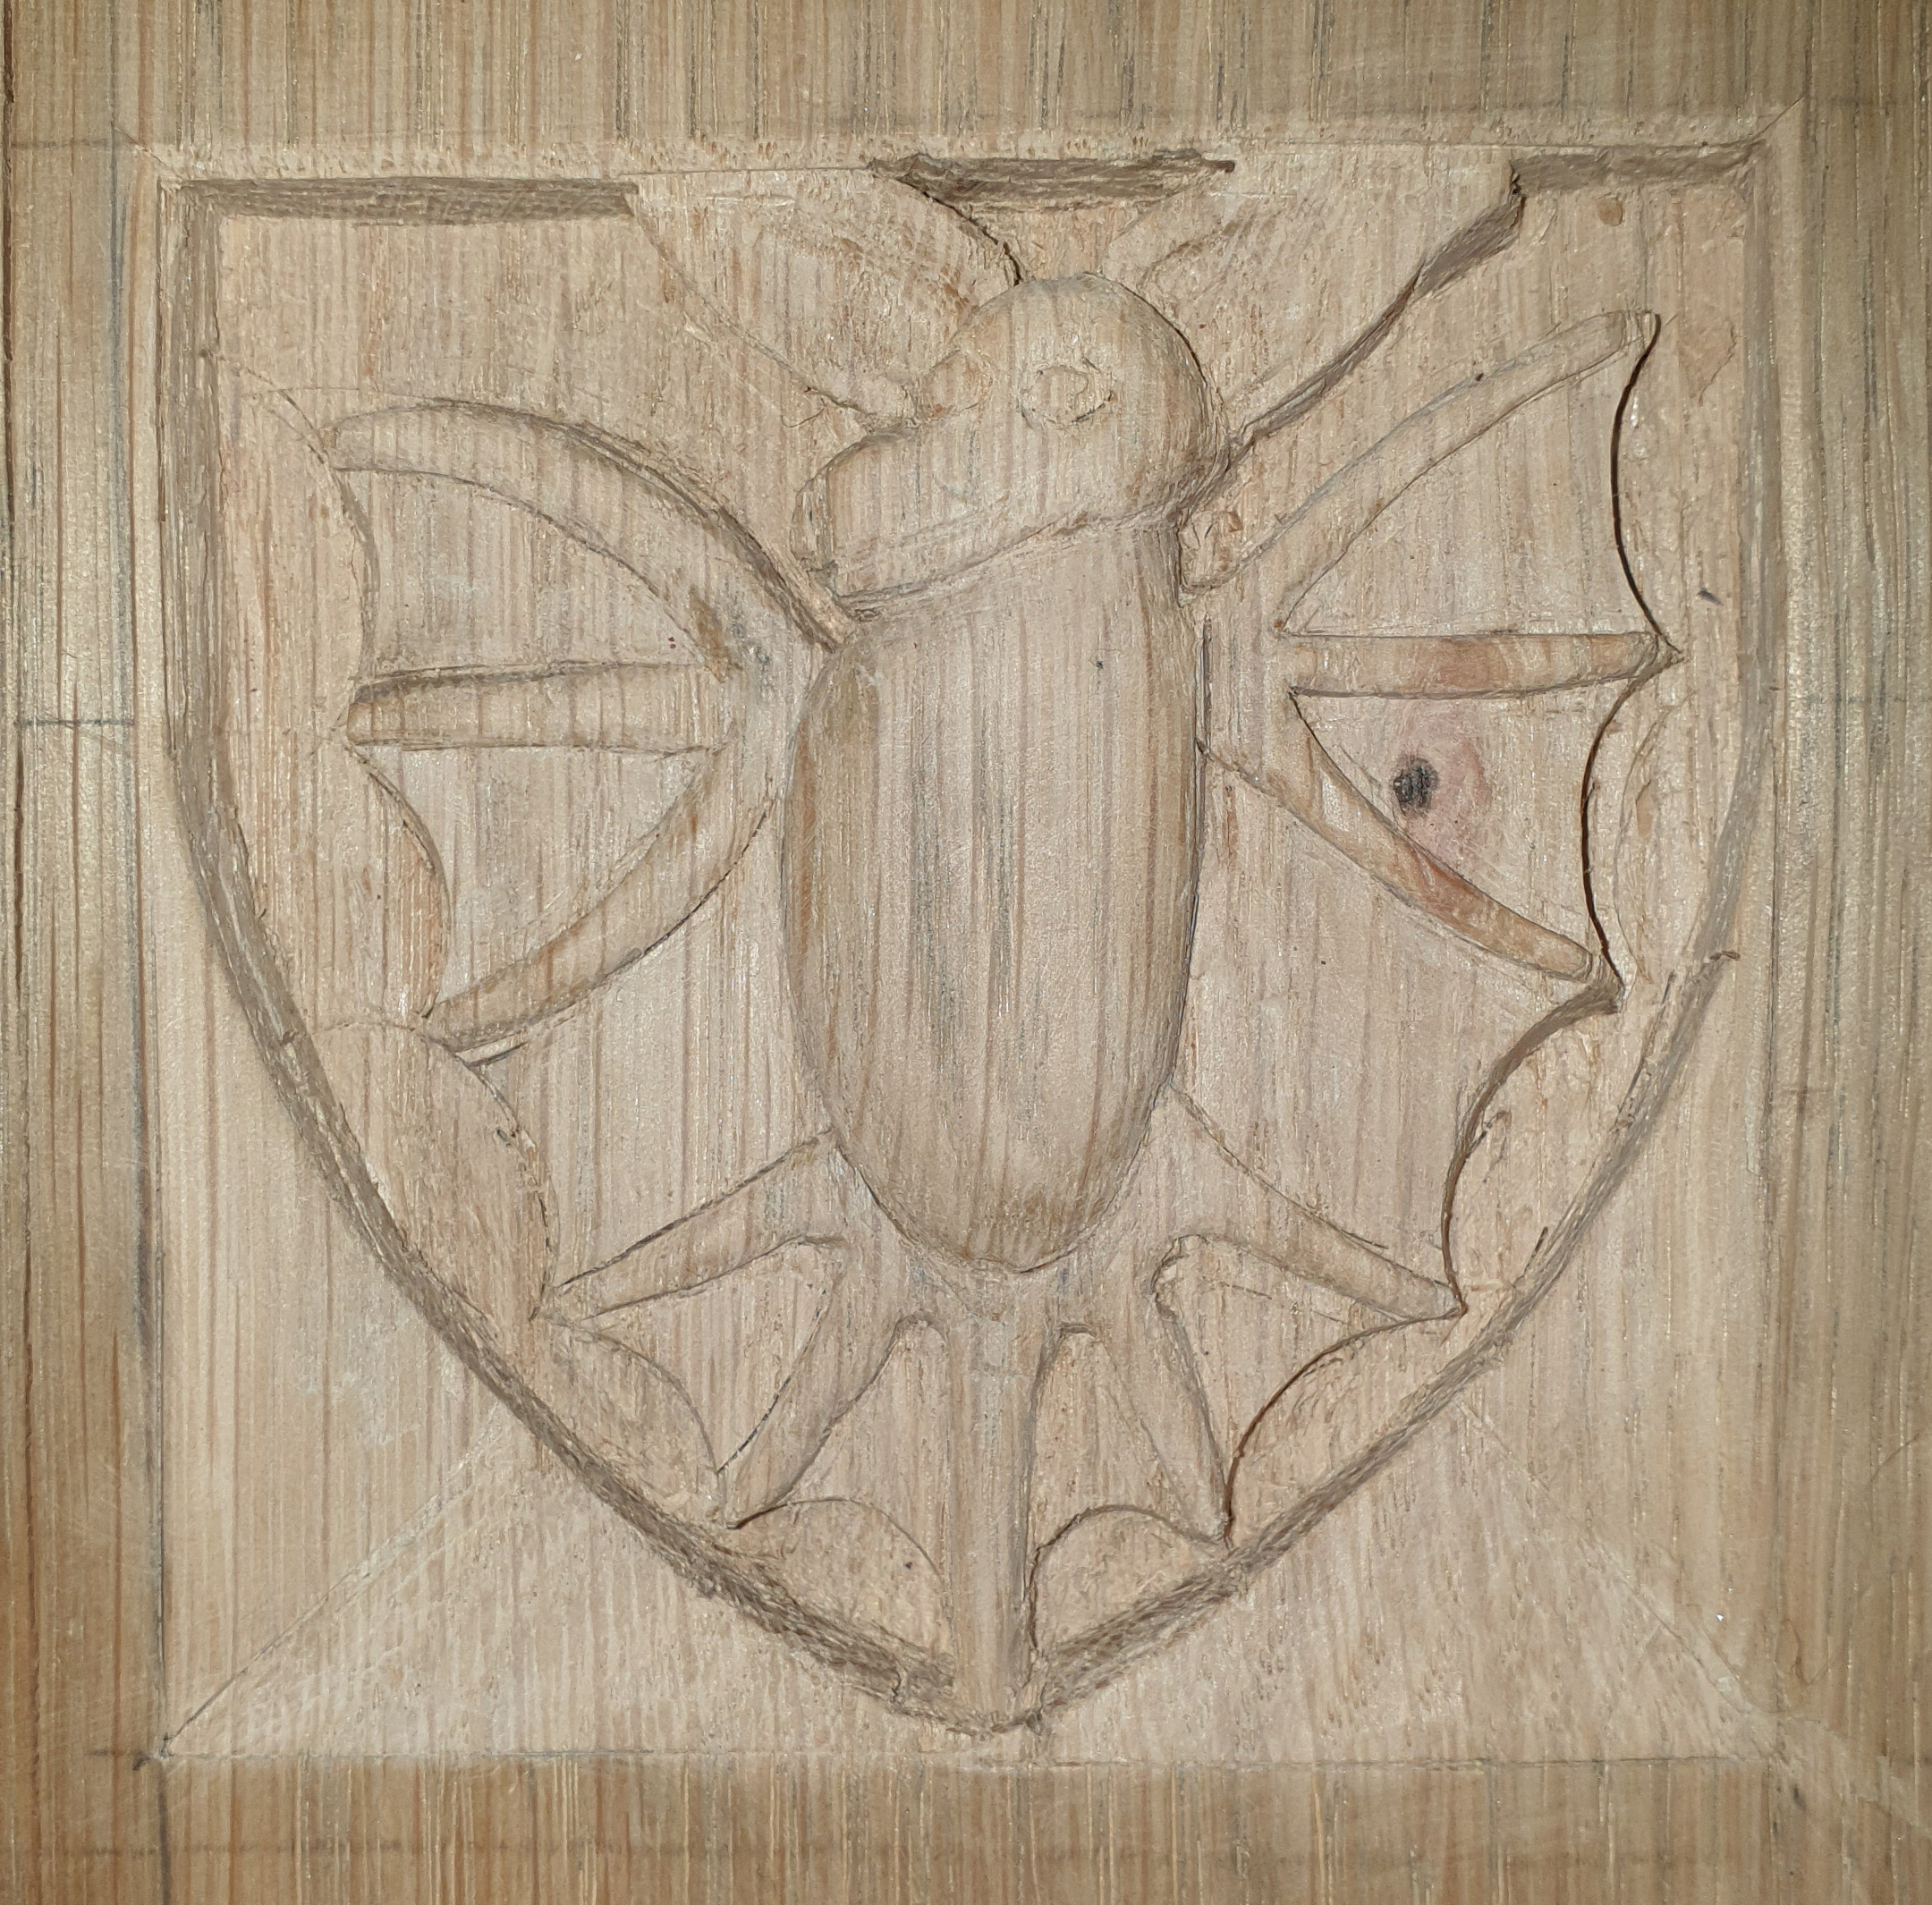
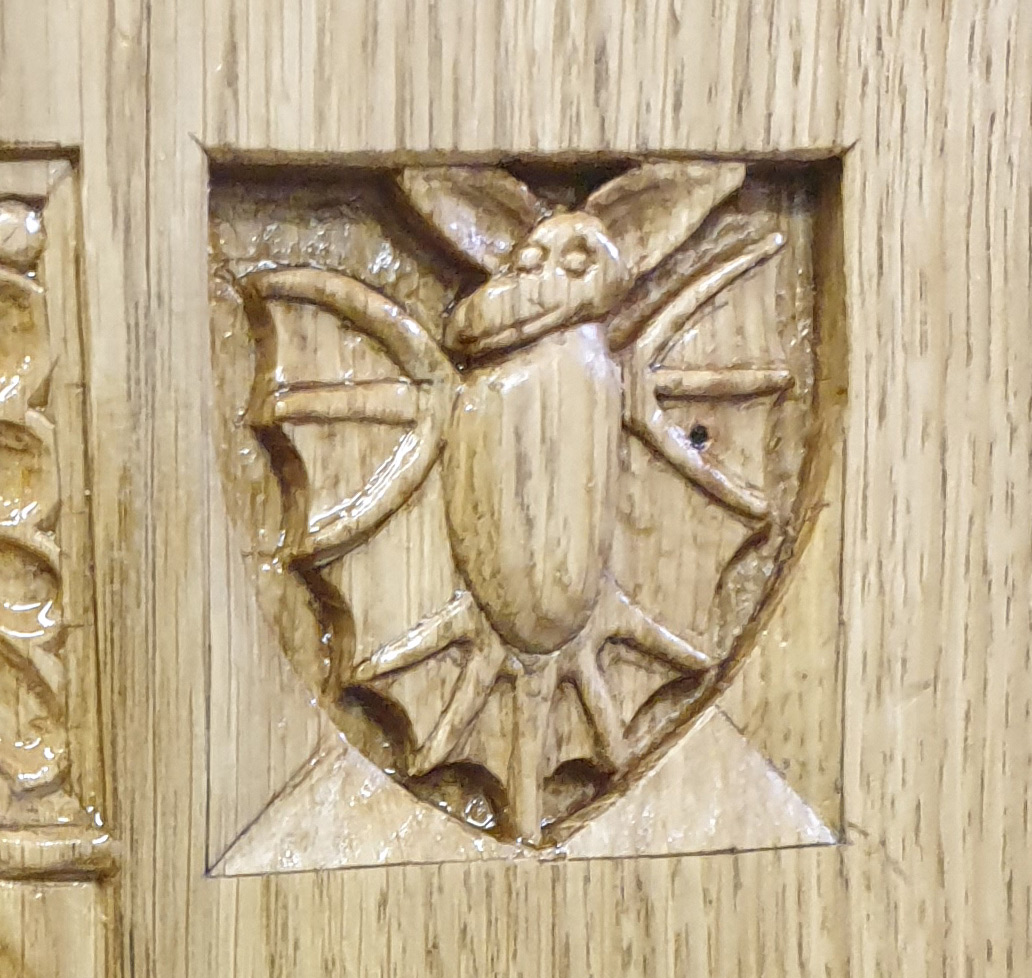
Also here do the photos below show the carving process of the bat and the lion.

The bat


The lion


Finishing the door

After carving the flat areas of the door were sanded and the door was oiled with linseed oil. The attachment of the hinges and the lock will be dealt with in another blogpost.

The finished carving of the door.


The door within the tresoor, but awaiting the hinges and lock.

Thursday, 2 February 2023

The tresoor of Castle Hernen (Part 5) - The drawer

This post continues the series on making a six-sided tresoor for castle Hernen. Previous posts concerned the large and small panels and the frame, this post will concentrate on the construction of the drawer. We had visited the Muiderslot some years ago to have a more detailed look on how a medieval drawer was constructed (see the post 'A Medieval drawer' of 1 March 2019). The drawer of the tresoor was made based on this construction.

Making the drawer

The design of the drawn on the drawer front. 
 
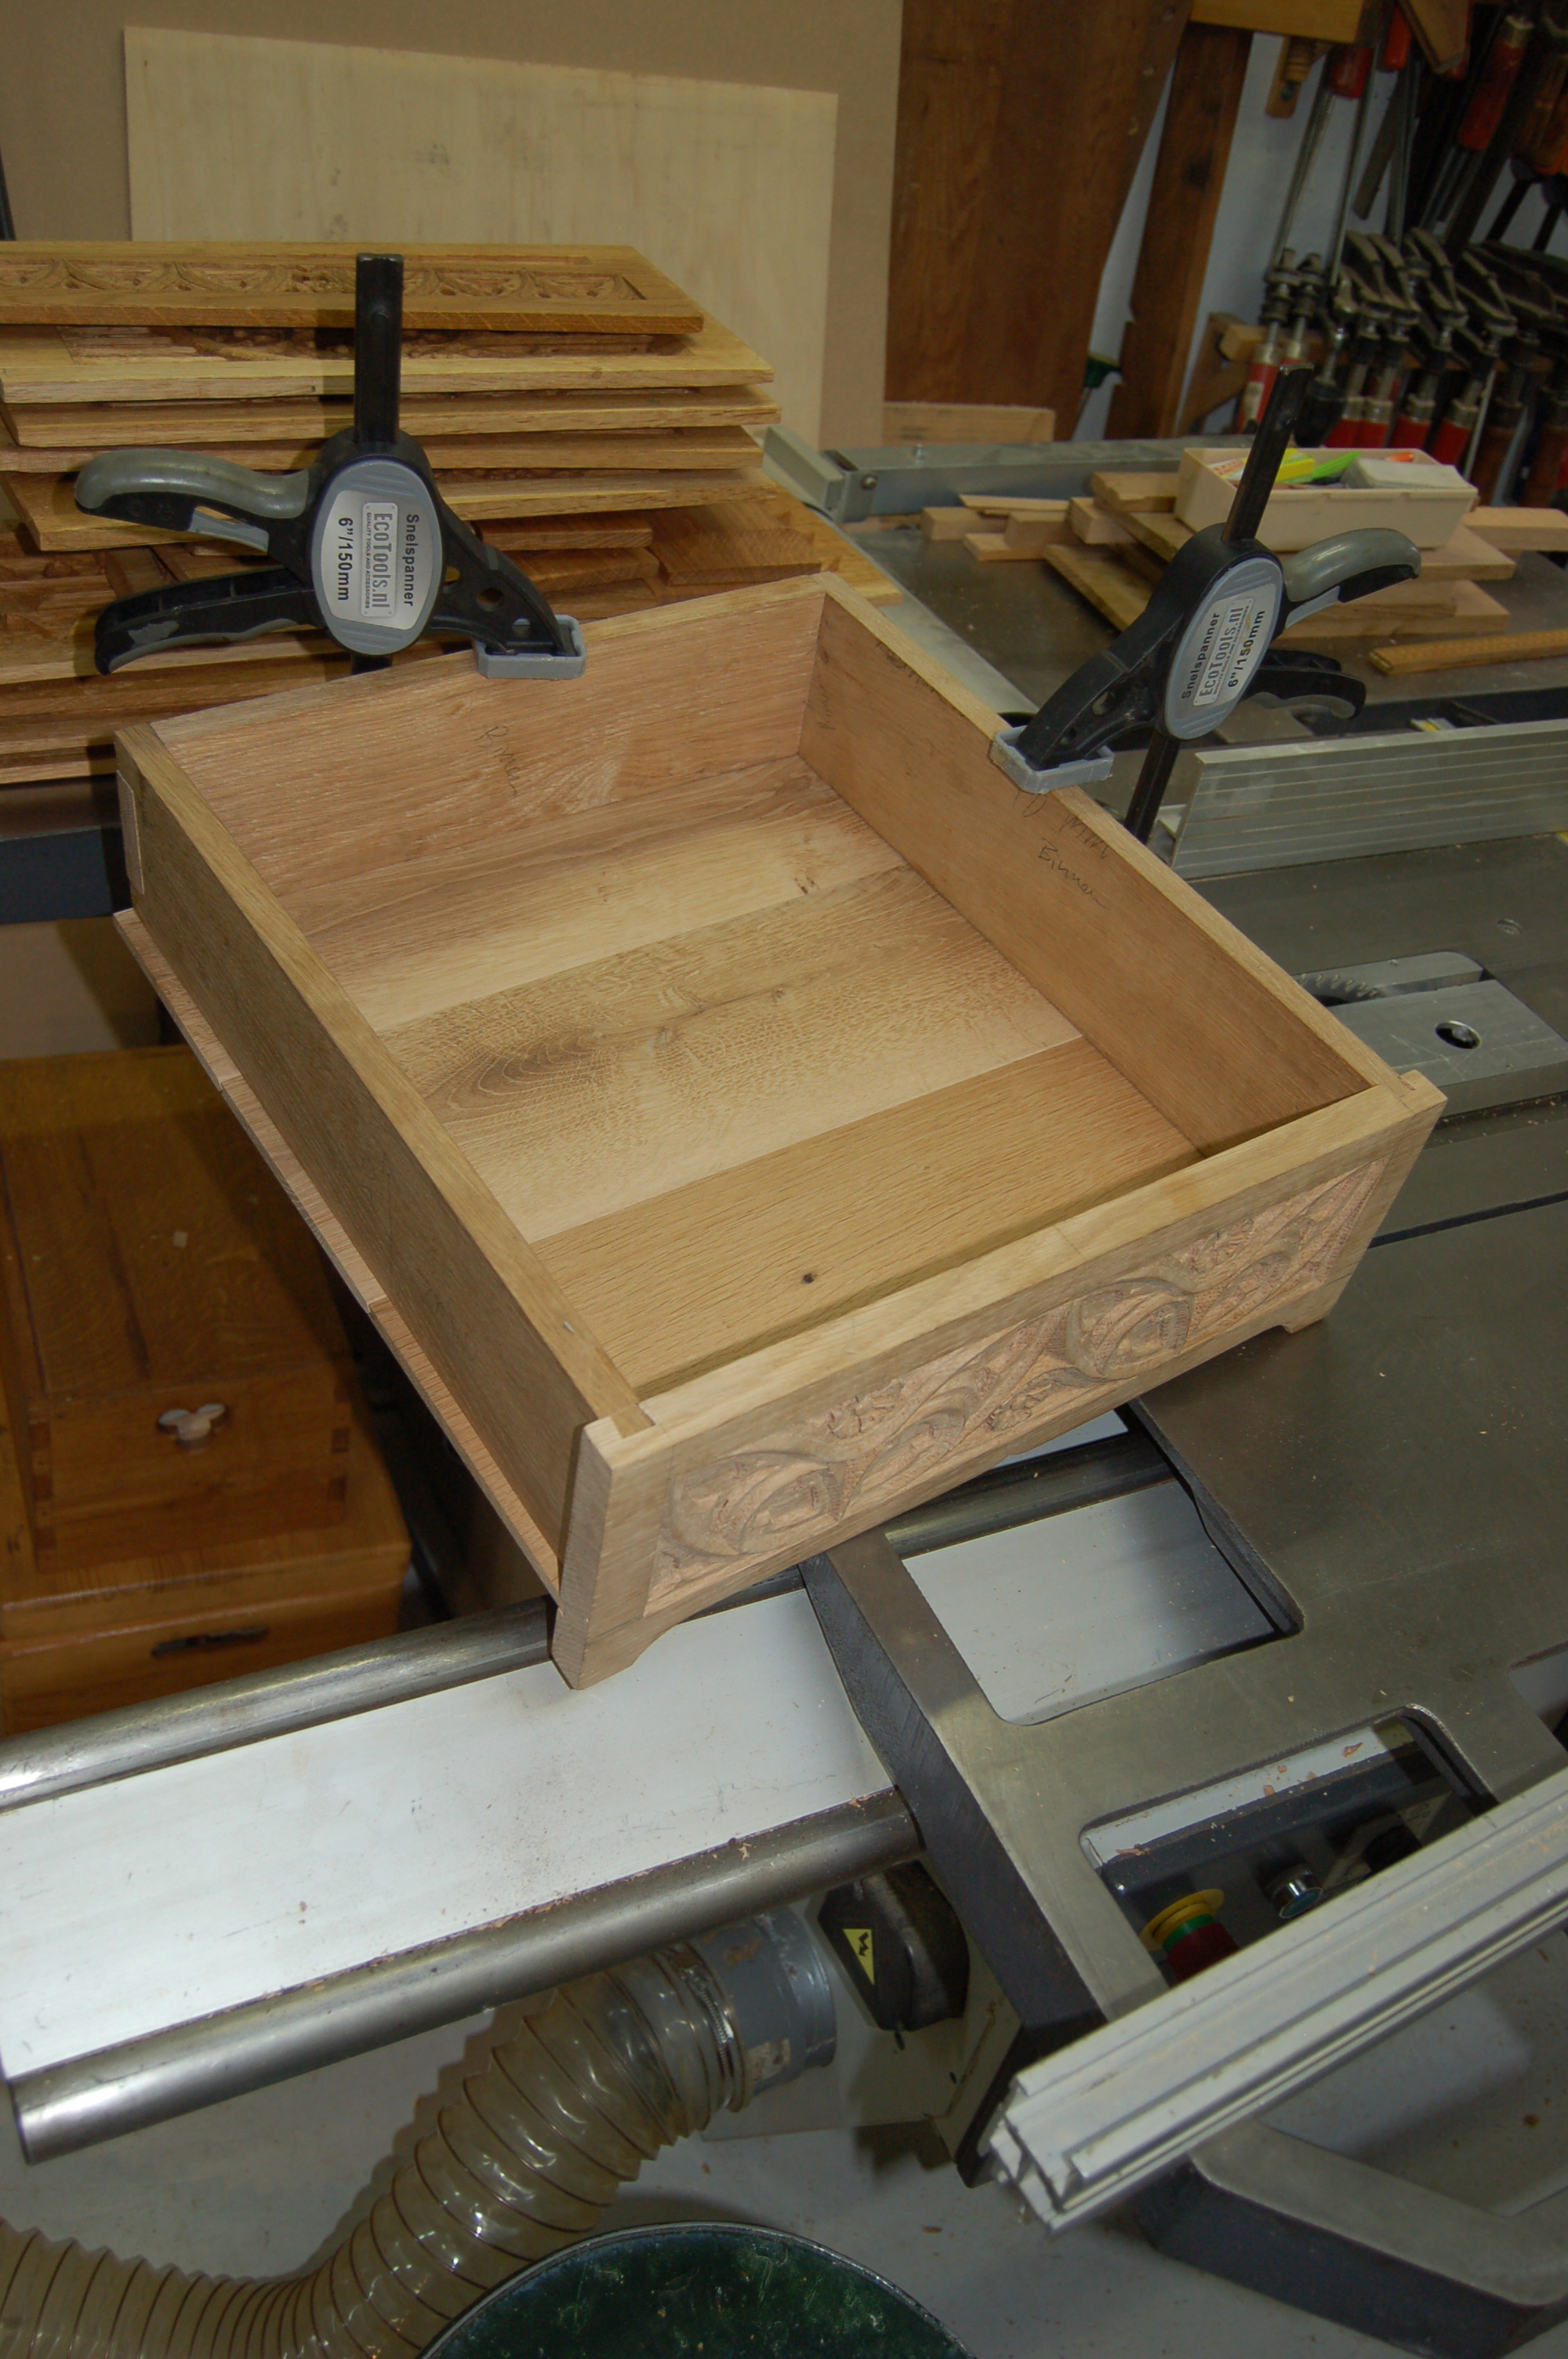
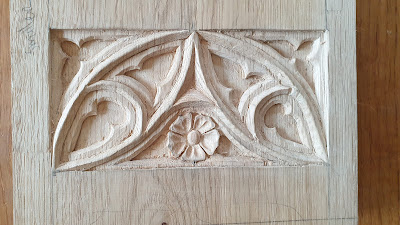
The front panel was first carved like the middle small panels (see previous post). Then two grooves were made on the backside using a router table - first with a straight router bit, followed by a dovetail router bit, so that two dovetail grooves appeared at the short sides of the (back of the) front panel. These were to connect the side boards of the drawer. Then a long groove was made at the bottom of the backside with a straight router bit; this groove was to fit in the bottom boards of the drawer.

Left: the front singele sided dovetail of Muiderslot drawer; Right: the front double sided dovetail of the Hernen drawer. 
Note that the Muiderslot drawer has more wood sticking out than the Hernen drawer.

The back and the side boards were connected with one large dovetail, like the Muiderslot drawer. These were sawn and cut by hand. Also the long dovetail of the front was sawn and cut by hand with a chisel.

Left: The large dovetail at the back of the Muiderslot drawer; Middle and Right: the large dovetail of the Hernen drawer.

Left: The large dovetail at the back of the Muiderslot drawer; Middle and Right: the large dovetail of the Hernen drawer.

For the bottom planks a few oaken panels of old furniture were reused. First they were made of the same thinness (around 5 mm), and fitted together with a V-groove. At the sides the bottom boards protruded a few cm. The parts that stuck out later will fit in the sliding rail of the drawer. The bottom rail was fixed with square pins to the sides of the drawer.

Left: using a recycled thin oak board from a demolished piece of furniture as bottom for the drawer. Note the groove where the bottom board fit into the drawer front. Right: the V-groove connecting the bottom boards together.
 
Showing the bottom of the drawer from the inside and outside. Note that the bottom boards are wider that the drawer. 
The extruding part is used in the sliding rail.
Fixing the bottom of the drawer with square wooden pins.

View of the bottom with the pins after cleaning up. 
 
Also the dovetails at the back were fixed with wooden pins, just like the Muiderslot drawer (left).
 
The inside and the outside of the finished drawer seen from the back.

The inside and the outside of the finished drawer seen from the front.

Making the drawer rail

 The drawer rail of the Muiderslot drawer.

The basic drawer rail is a square oaken rod, with a groove in it. The groove was made using the router table and a straight router bit. The next step was more difficult: First positioning the rails attached to the drawer on the backframe of the tresoor, so that the exact position of the rails on the backframe could be marked. Then a square pin was made at one the end of each rail, and two corresponding mortise in the backframe of the tresoor (one for each rail). 

The drawer hanging on two drawer rails seen on both sides. These drawer rails were attached to the back of the tresoor (you can see the linenfold panels). 
 
Now the other side of the rails had to fit in the five-sided vertical front beam. This required that a part of the five sided beam had to be removed to fit a square rail. Also this side of the rails had a mortise and pin construction, so that the complete rail was fixed between the backframe and the front beams. 
A bit of wax was added in the groove of the drawer rails to improve the sliding.
 
The finished drawer closed in the tresoor.

The finished drawer open in the tresoor.

Sunday, 15 January 2023

Getting the large photos from the Thomasguild blog - correcting a mistake

All the time I thought I was posting medium to high resolution photos on my blog, but it appeared I have been wrong.

Yes, when writing a blogpost I added the high-resolution photo, but then I edited the html/xml code behind it, cleaning up the code and removing the unnecessary things. Some appeared to be not so unnecessary as I thought: the  <a href=".............">   </a> code surrounding the image <img> code was the clickable link to the large picture. 

My sincere apologies to you who deserve the large images.

However, the good thing is that the information to get the large images is still present in the blog. You only need to do something to get them. Below I explain how this works and give an example of how to do it.  There were two clickable photos on the previous blog. This is one of them.

The design for the front panel of the drawer.

When you look at the source-code of the blogpost. For your Firefox browser this is right -click with your mouse and choose  (view) source code. You will then see something like this.


All the ones starting with <img     are images. I there is also an <a href=    and </a> surrounding an <img ...> making it clickable. This is one of the images that you already could access. Below I have cut out the part containing the clickable image.


 <div class="separator" style="clear: both; text-align: center;">

<a href="https://blogger.googleusercontent.com/img/b/R29vZ2xl/AVvXsEgsOg7NheCl8epLWnjWQP33kSXjfdtp69QP54HvLSZpIhCnPD7uSc9ewVwlCX8n1g2Fbl9B6l0gHqrrbXck7ox5uRu-s6EDbGxTP1wudoet3RNg_P3mFcAR8vtAc0-M82GZjH4J4iqHoj-0wkeK99zvJh2GIFzUYv3op9V5dVahsfwOxL983AFEMr2y/s2953/lade-front.jpg" style="margin-left: 1em; margin-right: 1em;">
  <img border="0" data-original-height="1661" data-original-width="2953" height="360" src="https://blogger.googleusercontent.com/img/b/R29vZ2xl/AVvXsEgsOg7NheCl8epLWnjWQP33kSXjfdtp69QP54HvLSZpIhCnPD7uSc9ewVwlCX8n1g2Fbl9B6l0gHqrrbXck7ox5uRu-s6EDbGxTP1wudoet3RNg_P3mFcAR8vtAc0-M82GZjH4J4iqHoj-0wkeK99zvJh2GIFzUYv3op9V5dVahsfwOxL983AFEMr2y/w640-h360/lade-front.jpg" width="640" />&nbsp;</a></div>
<div class="separator" style="clear: both; text-align: center;"><span style="font-size: x-small;"><i>The design for the front panel of the drawer.</i></span><br /></div>


If you compare both the image source of the small image (the src=https) with that of the large one (the a href=https), they are almost identical. The small one contains an indication of its current (small) size, e.g. the blue w640-h360 (see the orange height of 360 and width of 640 in the code), while the large one carries the original width (the blue s2953 . So all we have to do is swap the part of the small size with that of the original size. And luckily for us the original width is also given in the <img as data-original-width="2953" . So the replacement part should be s2953  . Do not forget to add the s before the original width.

EXAMPLE

Thus for the unclickable image of the previous post shown below
 

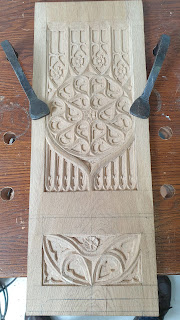
Left: The finished carving of the panel. Right: The large and smaller panel still connected and clamped.
 
 
  • Display the source code of the blogpost in your browser.
  • Find the <img ...... > line for the image and copy it to a text editor.
 
 <img border="0" data-original-height="1772" data-original-width="3150" height="225" src="https://blogger.googleusercontent.com/img/b/R29vZ2xl/AVvXsEjKcXIw8lgfz3e52HP0kBQqTYC8KOVKvJ3h4uqw653k9J9dgh2Jm6sjskJqvFqyYbVkvskbGcEslVUBFkhTGbElNo9Z85XJwR6PfIfXfpCfssOP25rBUb_drgN2PQt5bZOlkHT1awA3Ws4M9XpMnkk-Hg1HMKEitzWgFs6FnAPtkUlGbwtnOReMNIjk/w400-h225/middle-panel-ready.jpg" width="400" />
    <img border="0" data-original-height="3150" data-original-width="1772" src="https://blogger.googleusercontent.com/img/b/R29vZ2xl/AVvXsEi8kdlwoNtRQvHwvIBSPXJFdxfXAOfULRJxVuM9J8y4lpI97QTos58SCbCAPQAMpOTf96g7NQaeOECq8VeqTFWboBT1BeQ1ZhObSoQzDmmYidzDLuf8FYdHgk9M4FnLOFSYDzhkp3Ey0clEBO9xTRUJIZxNJuWYno5pSk311LRwcS5R47FtqjKP3xoZ/s320/one-middle-panel-cutting.jpg" width="200" />

 
  • Replace the part that here is marked in red with with  s + the part marked in green, so s3150 for the first, and s1772 for the second. The part to replace is always between the last two forward slashes before the .jpg (name).
  •  You now made two valid internet links to the large images which you can copy directly into your browser. You then have access to these two large photos:
https://blogger.googleusercontent.com/img/b/R29vZ2xl/AVvXsEjKcXIw8lgfz3e52HP0kBQqTYC8KOVKvJ3h4uqw653k9J9dgh2Jm6sjskJqvFqyYbVkvskbGcEslVUBFkhTGbElNo9Z85XJwR6PfIfXfpCfssOP25rBUb_drgN2PQt5bZOlkHT1awA3Ws4M9XpMnkk-Hg1HMKEitzWgFs6FnAPtkUlGbwtnOReMNIjk/s3150/middle-panel-ready.jpg
 
and
 
https://blogger.googleusercontent.com/img/b/R29vZ2xl/AVvXsEi8kdlwoNtRQvHwvIBSPXJFdxfXAOfULRJxVuM9J8y4lpI97QTos58SCbCAPQAMpOTf96g7NQaeOECq8VeqTFWboBT1BeQ1ZhObSoQzDmmYidzDLuf8FYdHgk9M4FnLOFSYDzhkp3Ey0clEBO9xTRUJIZxNJuWYno5pSk311LRwcS5R47FtqjKP3xoZ/s1772/one-middle-panel-cutting.jpg