Sunday, 2 February 2025

Tresoor of Castle Hernen Part 10: the lock and hinges

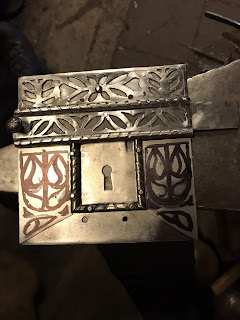
The lock with key, and hinges in place. Note the red leather under the hinge.

One of the last things to complete the tresoor for castle Hernen were the metal fittings: the hinges and the lock. As creating elaborate medieval metal fittings is not our focus as the St. Thomasguild, we asked a very good historical blacksmith - Klaas Kloosterhuis - to make them for us. (He also made the fittings to the scapradekijn and our toolbox, among other things.)
 

Designing the metalwork

Medieval fittings ranges from simple curled hinges and lockplates to very decorative ones. The latter are often found on dressoir-like furniture like our tresoor. We took some examples from existing dressoirs and based on that drew our own design.
 

Dressoir in the Musee des Arts Decoratifs, Paris, France dating from the late 15th century.
 
The lock of the same door. The sliding bar is on top of the lock and locks into a separate U clamp.

Details from the hinges, which are fixed to the door with many small nails. The decoration of the hinges is open, showing the woodwork underneath.
 
Tresoor with German style late medieval hinges. Often with openwork hinges there is a reddish coloured layer underneath, either a coloured thin metal sheet or a thin piece of coloured of leather.
 
We first created several designs on paper and tried it out on the wooden door of the tresoor, so we could judge what looked best.
 
The 'winning' design, based on the one in the Musee des Arts Decoratifs.

This one did not make it. We found our tresoor too French in style and too decorative to fit this (a bit0 simpler design.
 
Details of the design for the lockplate and the hinge.
 
The attachment plans for the hinges showing the 112 degree angle at the short end of the hinge. 
Note that in the end no pins or nails were long enough to be folded back.

Creating the metalwork

 
As our blacksmith Klaas Kllosterhuis also is a re-enactor (16th century) and was visiting castle Hernen with his company, we took the opportunity to bring the tresoor to the castle, so he would see it firsthand and we could communicate easier on our expectations for the lock and hinges.  

Some of the 16th century re-enactment members with Bram and the tresoor in the courtyard of castle Hernen.

Some steps in the crafting process of the lock and hinges. Photos taken by Klaas Kloosterhuis.
 

Attaching the metalwork

Now that the finished hinges and lock had arrived (with two keys, i.e. one spare one! This is important to have), we needed to attach them to the tresoor. We started with the lock, as this required additional carving work on the door, and this is more stable and easily done on a flat surface (workbench).

The lock and hinges that had just arrived by post on top of the door.

A space needed to be cut in the door to fit the actual lock hidden behind the lockplate. This cut-out space is often seen on medieval dressoir doors without their metalwork. See the blogpost on the making of the tresoor part 6 for some examples.

The next step was to attach the hinges to the door. This was a bit more tricky. At the actual hingepoint, where most of the forces would occur, there were only a few options for attaching the nails. We thought that it would be better to reinforce this point by drilling two additional nail holes (and have two extra nails per hinge supporting the door). We also added a strip of red leather underneath the hinge. This has a dual purpose of being decorative and protecting the metal from rusting by the acids of the oak.

(Top hinge) The original hinge showing few nailholes at the hingepoint. (Botom hinge) The red dots indicate where new nailholes were made. One of the nailholes at the short end already has been drilled (a black "dot"). 
 
You can see the red leather underneath the hinge. 
 
Now that the metal was attached to the wooden door, the door (or the other part of the hinges) needed to be attached to the frame. Some material from the frame needed to be removed to fit the curved short end of the hinge. Removing was a bit complicated as the tresoor was already assembled. Luckily the crown was not fixed at that time, allowing us a bit more moving space and better lighting possibilities. We had to test the fitting of the hinges several times, removing some extra wood where necessary, in order to have the correct depth of the door inside the frame (i.e. the same depth as the panels in the frame). When this was correct, the hinges were nailed to the frame with 2 flat nails, and a 'normal' one per hinge.
The inside of the tresoor. The short end of the hinge needs to follow the curvature.
 
Bram creating some saw cuts to define the edges for the recess for the hinge. Doing this by chisel is not possible, due to the six-sidedness of the tresoor. There is no support underneath and hammering a chisel would make the tresoor to wobble.
 
From the inside, cutting the recess for the hinge with a chisel.

Checking the depth of the door to the frame.

Using a small Stanley router plane (No. 271), and sliding sharp flat chisels 
to smooth the surface of the recess for the hinge.
 
 
The hinge inside the recess, seen from the front. Ideally, the hingepin would fit perfectly within the wooden rounding of the frame, thereby preventing the removal of the pin for unauthorized opening of the door. It would also be more pleasing to the eye. Most surviving dressoirs however are just like ours, having a non perfect fit.

The final step was to cut out the recess for the metal U in the frame. After that, some holes were predrilled in the frame for the pins at both ends of the U and the U was hammered in place. This proved to be a strong fix, and there was no need to fold the pins inside the tresoor to secure the U. (in fact, the pins were not long enough anyway.) 
 
Hinges and lock fitted, open door.
 
With this last step done, the tresoor was complete and the crown could be fixed on the top as well. The final tresoor looked like .....
 
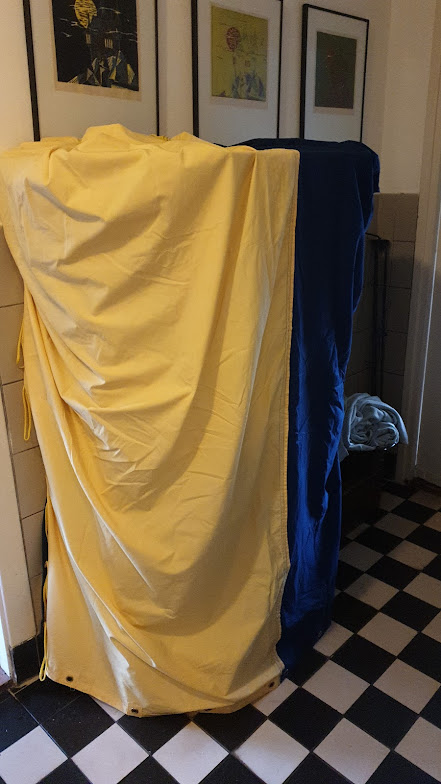
The tresoor at the castle will be shown in the next blogpost.